
[Playbook] Backlog Scanning of Individual Documents with a Desktop Scanner
Here’s the Situation: You’ve been tasked with digitizing a huge backlog of paper documents as part of your bank’s transition to a document management system. You could use a multifunction device with barcodes, but you’re leaning toward using the desktop scanner (in the comfort of your own office) to systematically work through each customer’s file. Here are a few “plays” for working through your backlog with a desktop scanner.
Play #1: Scanning Directly into the Customer’s Electronic File
One of the most common approaches that we see involves scanning documents directly into a customer’s electronic file. This makes perfect sense from a process standpoint, as you’re already looking at the customer’s hard copy loan file. It’s also easy to do a side-by-side comparison and check things off as they’re scanned into your document management system. Plus, you don’t have to mess around with barcodes and cover sheets.
Here’s the Game Plan
Let’s assume that you’re scanning documents into AccuAccount. Here’s how this play would work. Step 1: Pull out the customer’s loan file and open it on your desk. Step 2: Locate the matching record in AccuAccount by searching for the customer’s name, number, loan number, etc. You’ll be taken to a screen that looks like this: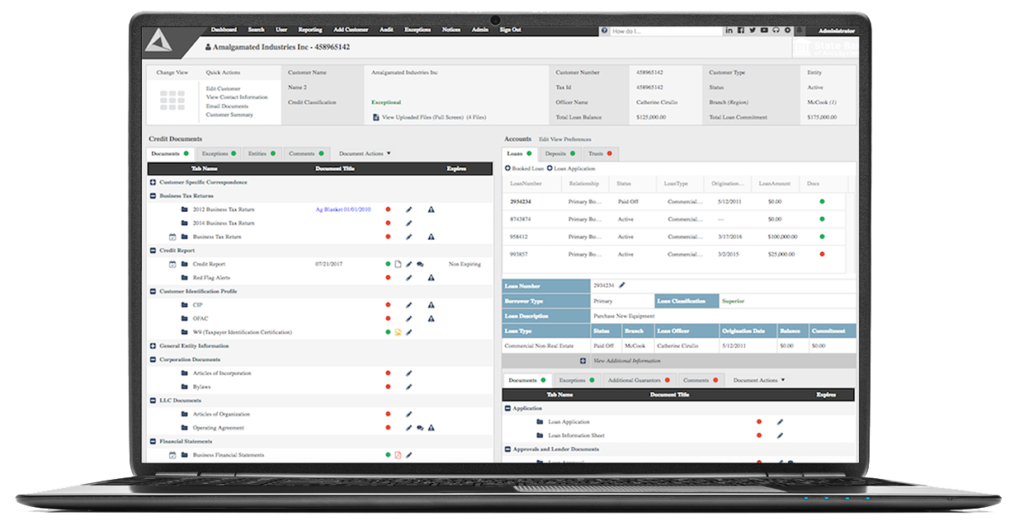 Step 3: Load the paper document into your desktop scanner.
Step 4: Click on the document that you want to scan, such as a credit report, loan application, or CIP. Doing so launches accuimg, which is Alogent's desktop scanning application. Within a few moments, your digitized document will appear in the correct customer location in AccuAccount! AccuAccount even marks the document as “green” (instead of red) to indicate it’s in the file. Repeat this process for each document in the customer’s file.
Pro Tip: Use accuimg to preview, edit, annotate, rotate, and delete pages prior to saving to AccuAccount. Reduce unnecessary QC issues later on!
Play #2: Scanning and Editing with accuimg
Another option involves starting with accuimg, Alogent’s scanning application that we mentioned in the first play.
Here’s the Game Plan
Step 1: Pull out the customer’s loan file and open it on your desk.
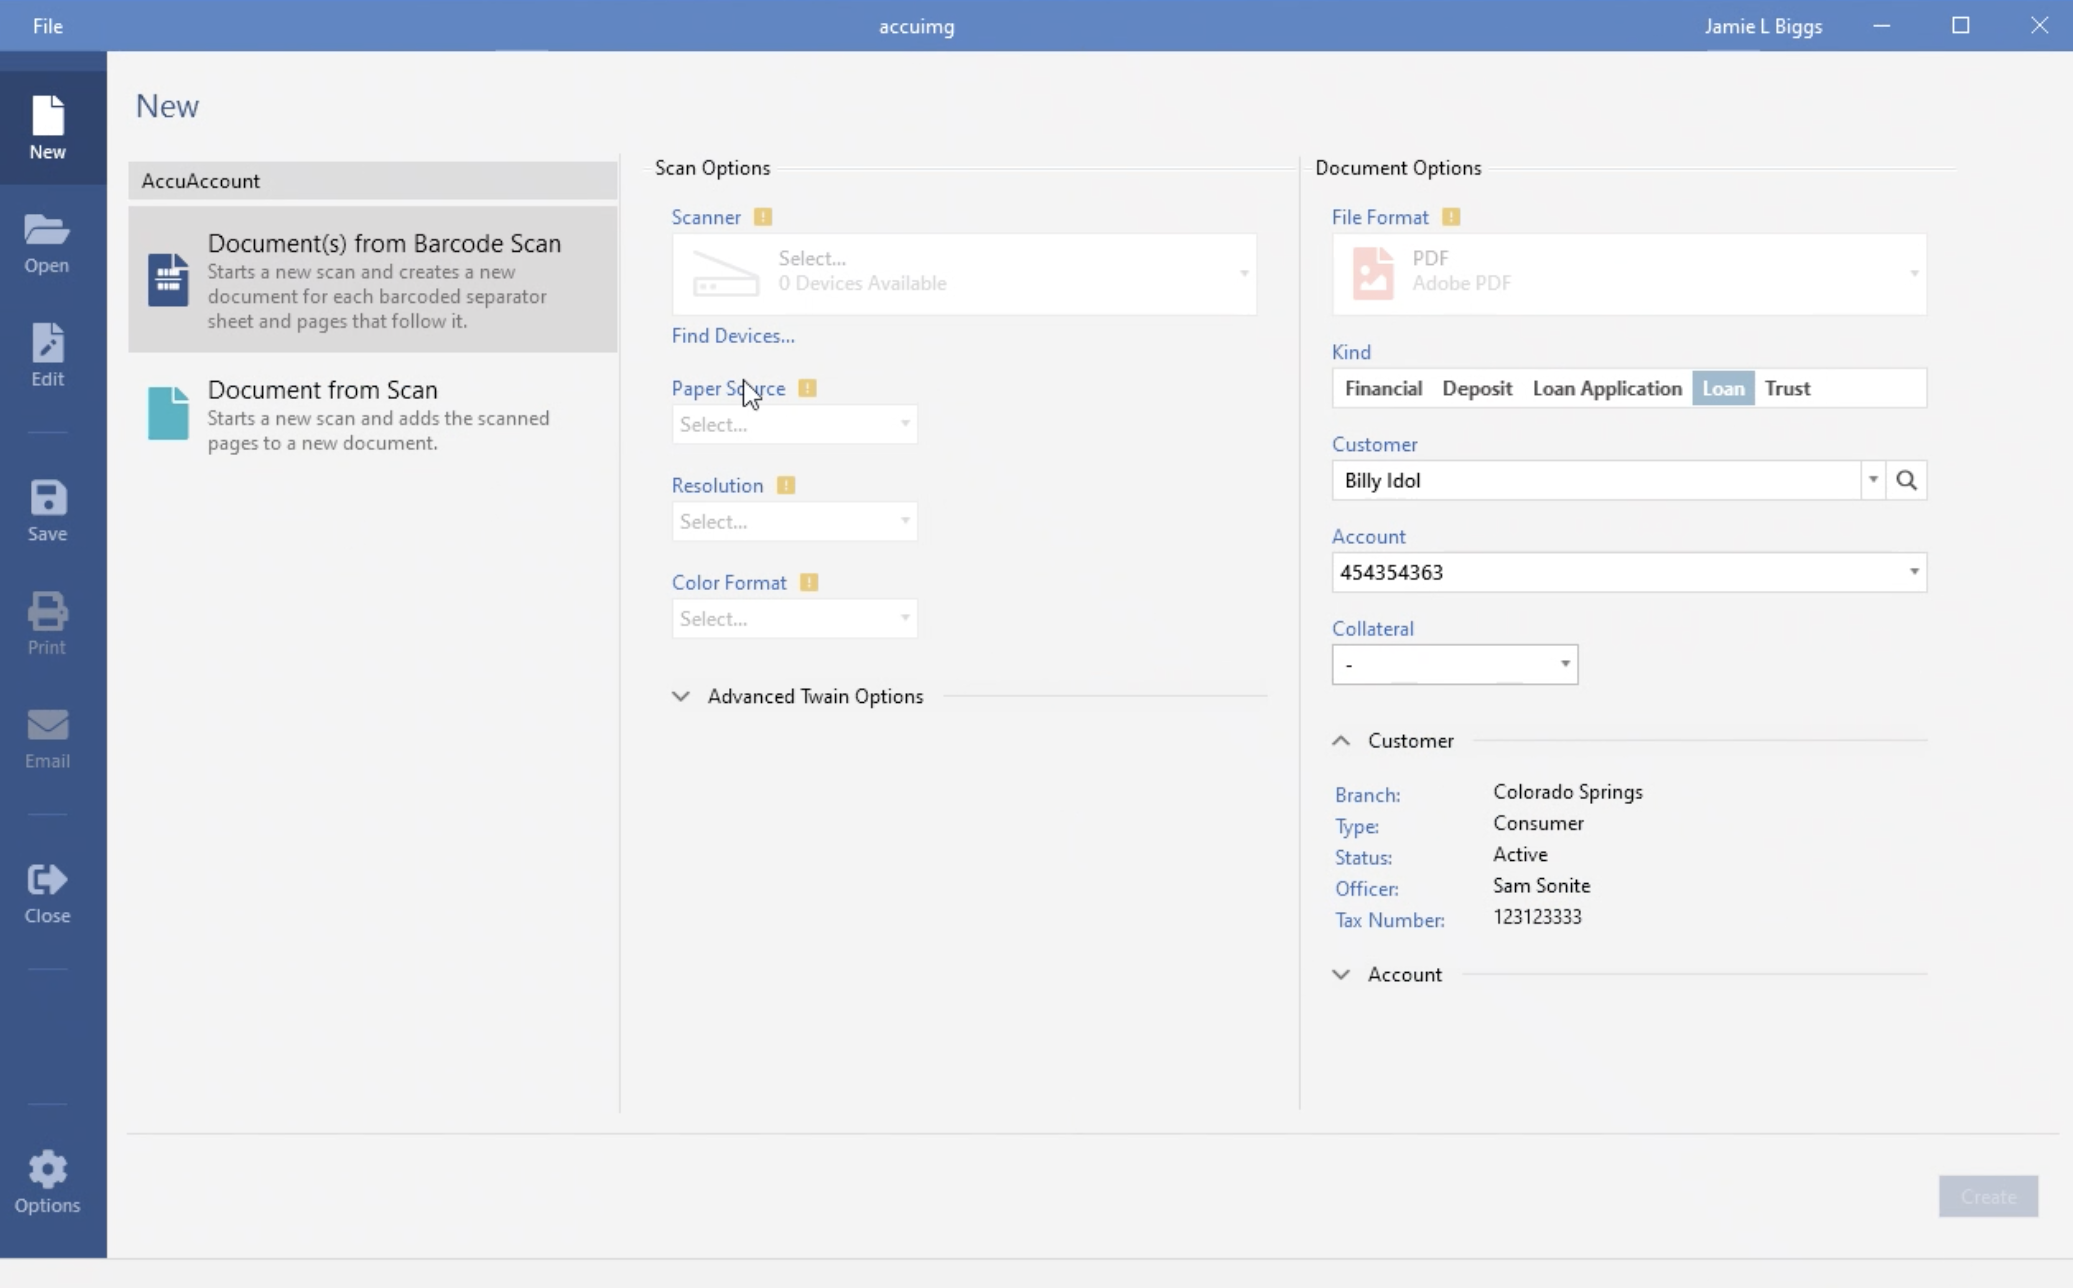
Step 2: Launch accuimg and search for the customer’s name, number, loan number, etc.
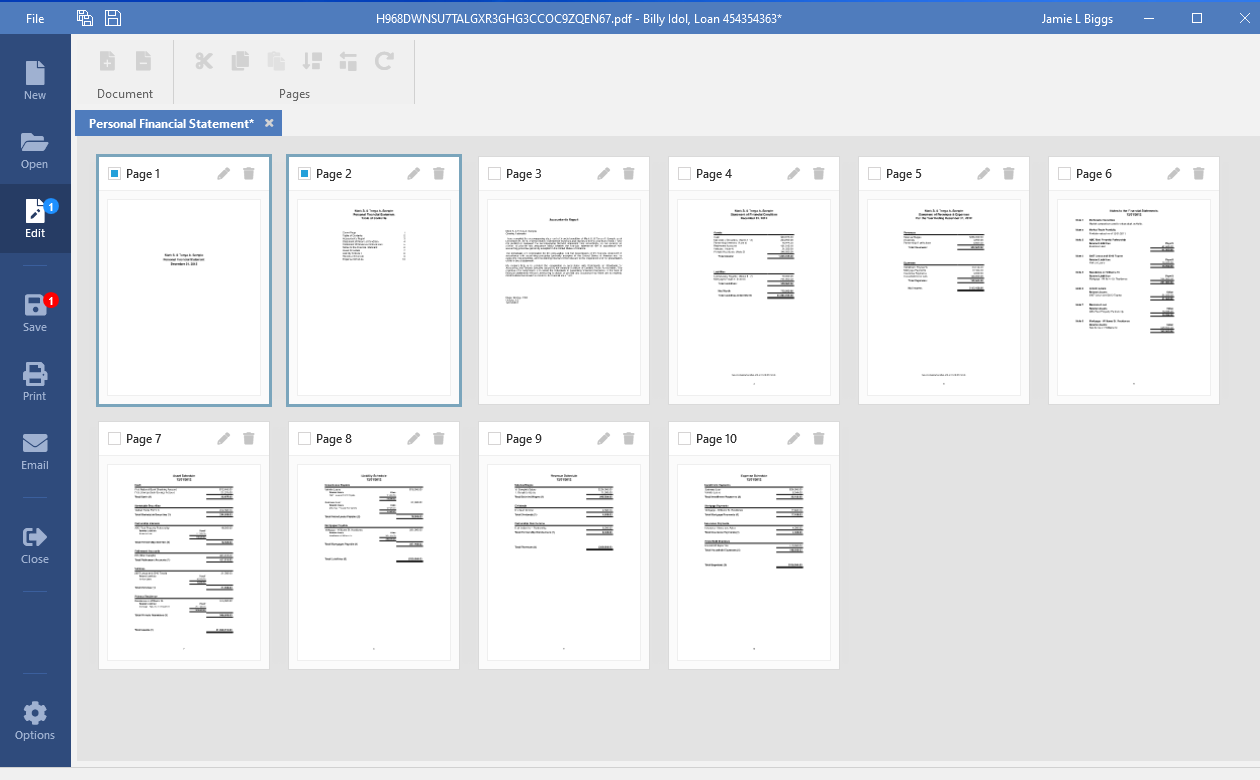
Step 3: Select the appropriate settings in accuimg and load the document into your scanner. Here’s an example of what you might see after scanning:
Need to edit something? The “edit” tab of accuimg makes it easy.
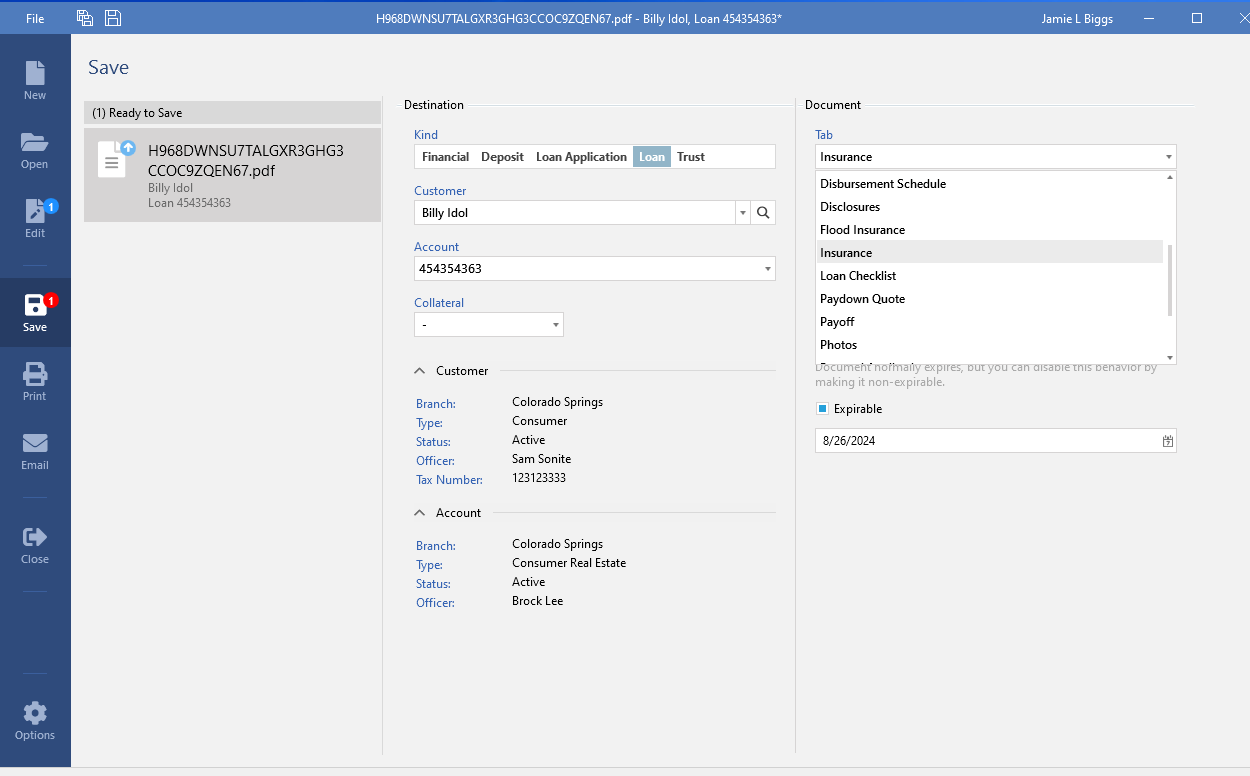
Step 4: Save your work, and the document appears in the correct place in AccuAccount. You’ll need to repeat these steps for each document in the customer’s file.
Play #3: Using accuimg + barcodes
Looking to move even faster? Our accuimg scanning application works with barcoded documents (and/or barcoded cover sheets), virtually eliminating the need to manually enter in document-specific information.
Here’s the Game Plan
Follow the same steps outlined in the previous play, but in step three indicate that you’re initiating a barcode scan. This will allow you to bypass some of the manual data entry that is required for scanning without barcodes.
 You’ll still be able to edit your scanned-in document before saving it to AccuAccount.
Using Cover Sheets?: Remember to print your barcoded cover sheets on pastel-colored and/or legal-sized paper. Read our article about scanning with barcodes and multifunction devices.
Take a Tour of AccuAccount
Interested in learning more about AccuAccount? See why more than 32,000 bankers in the United States use our software. Simplify document imaging, exception tracking, audit prep, reporting, and much more. Learn more about AccuAccount.
Contact us today to learn more to see a demo
Be the first to know! Click below to follow us on LinkedIn for news and content updates!