
[Playbook] Saving Email Attachments in an Imaging System
Here’s the situation: Your financial institution is steadily working through its backlog, but new documents seem to arrive every day—especially through team members’ inboxes. Email may be one of the easiest ways for customers to share documents, but it also creates numerous challenges from an internal efficiency standpoint. This article shares four “plays” for quickly getting email attachments into your imaging system (we’ll assume it’s AccuAccount!).
Play #1: Drag and Drop Attachments from Your Inbox
Let’s imagine that a small business owner sends an updated operating agreement via email. The document was already in PDF format, which eliminates potential issues caused by scanning. The lender briefly reviews the PDF and then locates the customer’s record in AccuAccount. Now what?
Here’s the Game Plan
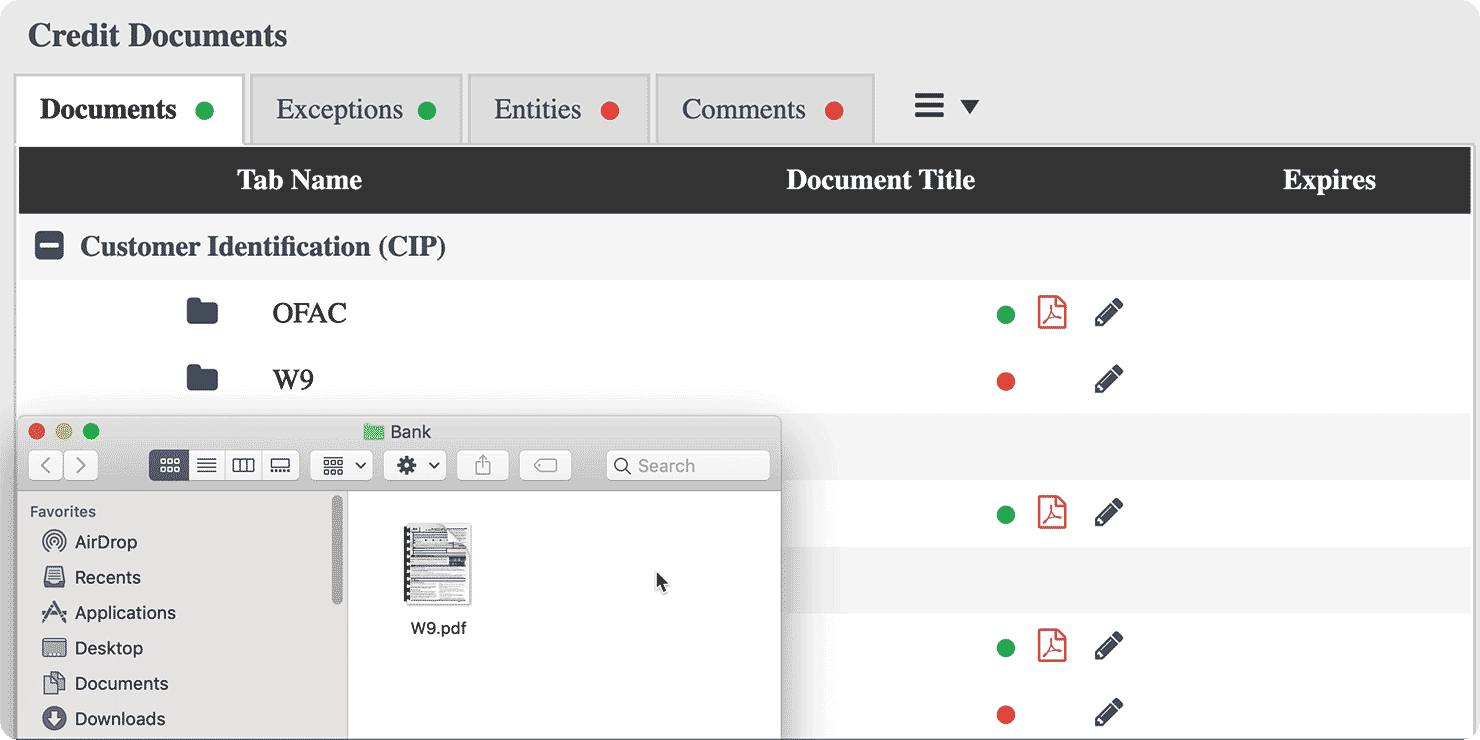
Step 1: Click on the email attachment and continue holding down on the mouse. Step 2: Drag the attachment from your email browser (or desktop email app) to the browser with AccuAccount. Step 3: Continue holding down as you hover over the correct document tab—in this case, the customer’s operating agreement tab. Release to upload the attachment in the correct location in AccuAccount.
Play #2: Download the Attachment First, then Drag and Drop
Some users may feel uncomfortable dragging and dropping from one window to another—especially users with smaller computer screens or those who are “set in their ways.” Or, perhaps a document needs to be converted from one format to another, such as PDF to TIFF.
Here’s the Game Plan
Step 1: Download the attachment to your desktop (or downloads folder). Step 2: Drag and drop the document onto the correct document tab in AccuAccount (see step 3 above).
Bonus Tip: Using AccuPrint is another viable option, especially for users that do not have direct upload permissions. Simply drag and drop to the AccuPrint icon on your desktop, which saves the document into an “uploads” folder in AccuAccount.
Play #3: Save Attachments via “File>Print…”
Using a “virtual printer,” such as AccuPrint, is another efficient way to save email attachments into the imaging environment. As previously noted, AccuPrint is a great option for users who cannot upload directly to AccuAccount.
Here’s the Game Plan
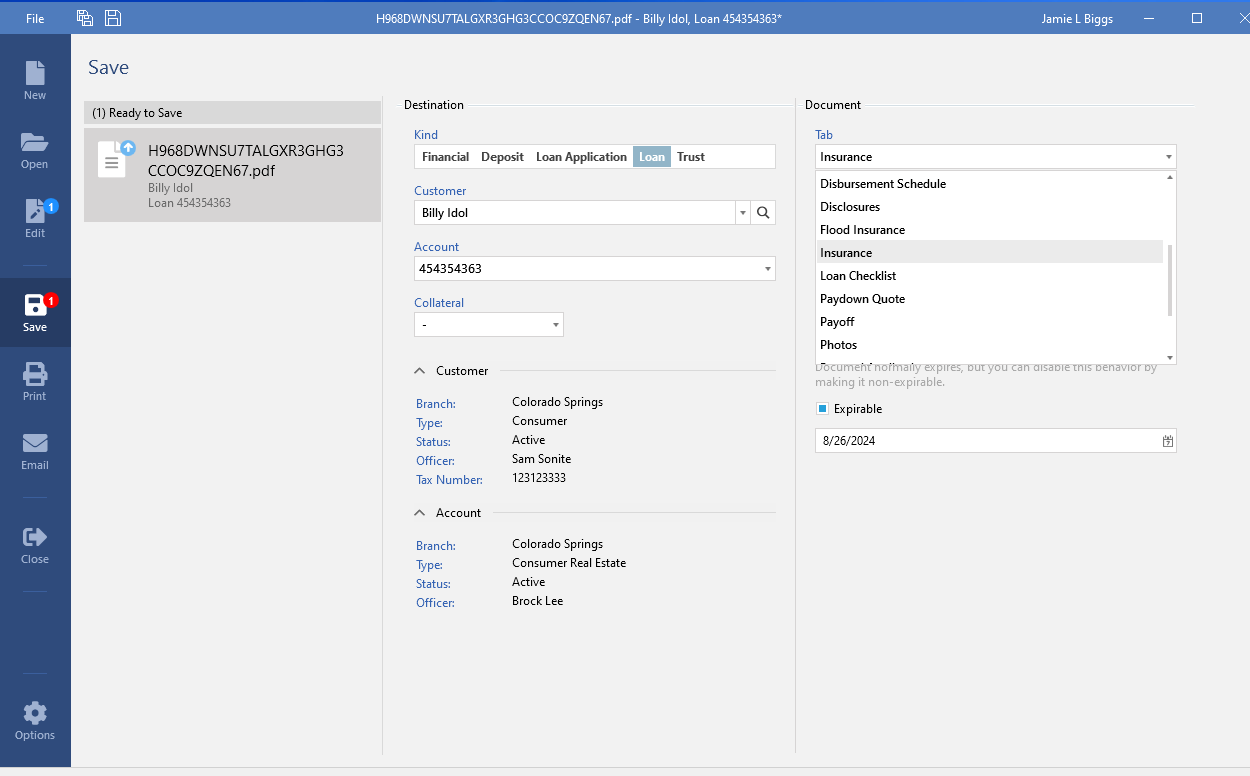
Step 1: Open the attachment. Step 2: Select “File>Print…” from the menu bar, which brings up a screen like this:
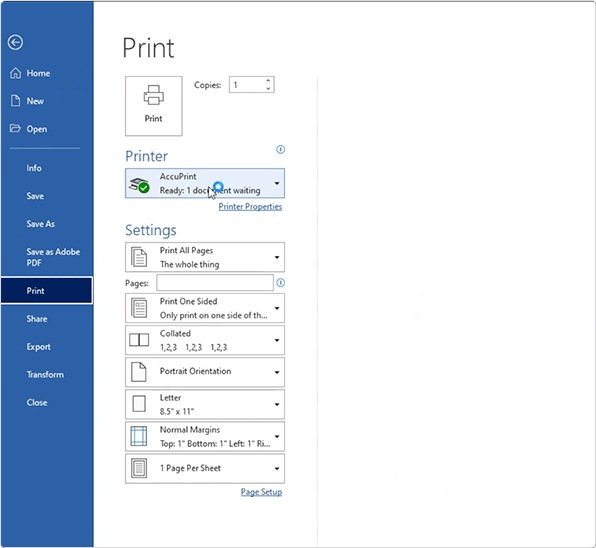
Step 3: Choose the “AccuPrint” printer, select your specifications, and click “Print.” AccuPrint allows you to select the appropriate customer, account, and document information. You can also add comments.
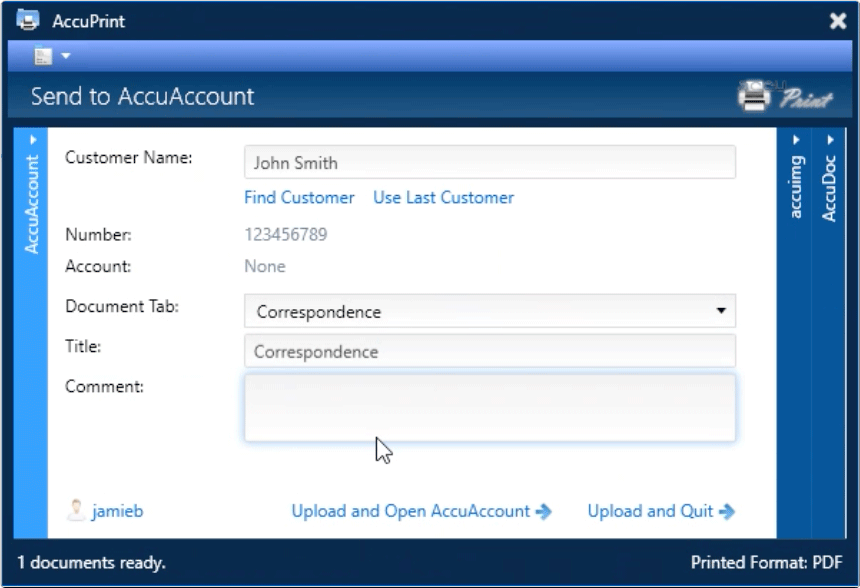
Step 4: Select your preferred upload option. Your email attachment will appear in an AccuAccount “uploads” folder for final QC and indexing.
Play #4: Edit Attachments Before Saving Them (with accuimg)
As we’ve discussed in previous playbook articles, accuimg is powerful desktop scanning software that enables users to edit, combine, and save documents into AccuAccount. This is especially handy when customers send documents that require modifications, such as a five-page document that is sent as five separate attachments.
Here’s the Game Plan
Step 1: Launch accuimg. Step 2: Drag and drop the email attachment(s) into accuimg. Step 3: Use accuimg to combine pages and make your edits. Once you’re happy with the changes, simply drag and drop the document from accuimg to AccuAccount. Or, you could use the “Save” menu in accuimg:
Questions?
Need a better workflow for imaging your email attachments? Contact us to chat with an imaging expert. We’re happy to help.
Be the first to know! Click below to follow us on LinkedIn for news and content updates!