
[Playbook] Document QC Review in AccuAccount
Here’s the situation: Your financial institution is looking for an ECM (enterprise content management) system that aligns with your quality control strategy . You’ve decided to implement AccuAccount, which supports a variety of use cases—from 100% QC to less formal spot checking.
This article shares three “plays” for performing document QC reviews in AccuAccount.
Play #1: Using Document History
Let’s imagine that you’re responsible for reviewing all documents scanned or uploaded at the Main Street branch. On Monday morning, you start your workday by reviewing documents marked as “QC critical”—a designation in AccuAccount that prevents the resolution of exceptions until after the completion of a QC review. Using the “Document History” section of AccuAccount might be a good place to start.
Here’s the Game Plan
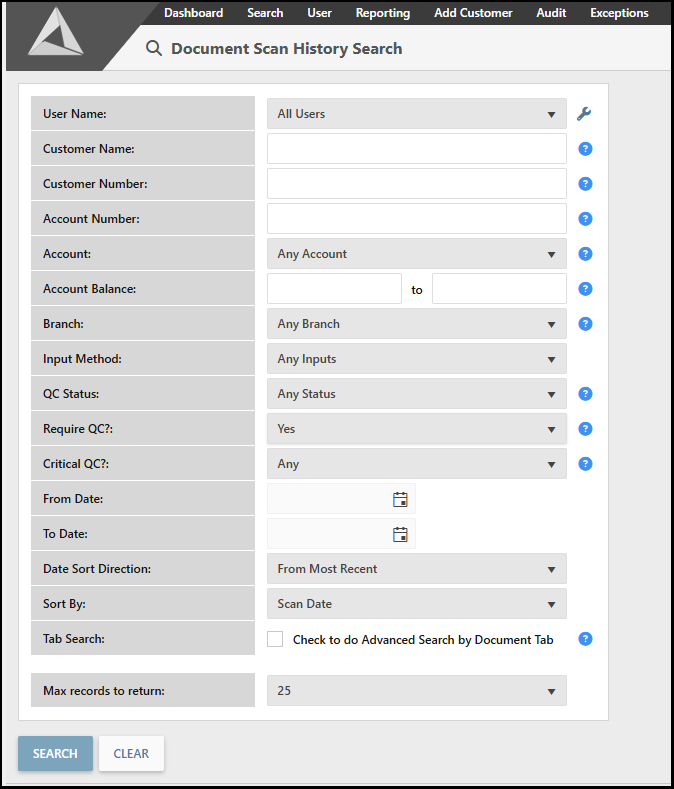
Step 1: Navigate to the “Document Scan History Search” page in AccuAccount and select your preferred filters. In this example, you would filter for the “Main Street” branch and “Critical QC.” You can further refine your search results by customer name, QC status, date range, and other criteria.
Step 2: Next, you’ll see the “Document History Results” page, which provides a detailed, sortable view of your financial institution’s document activity.
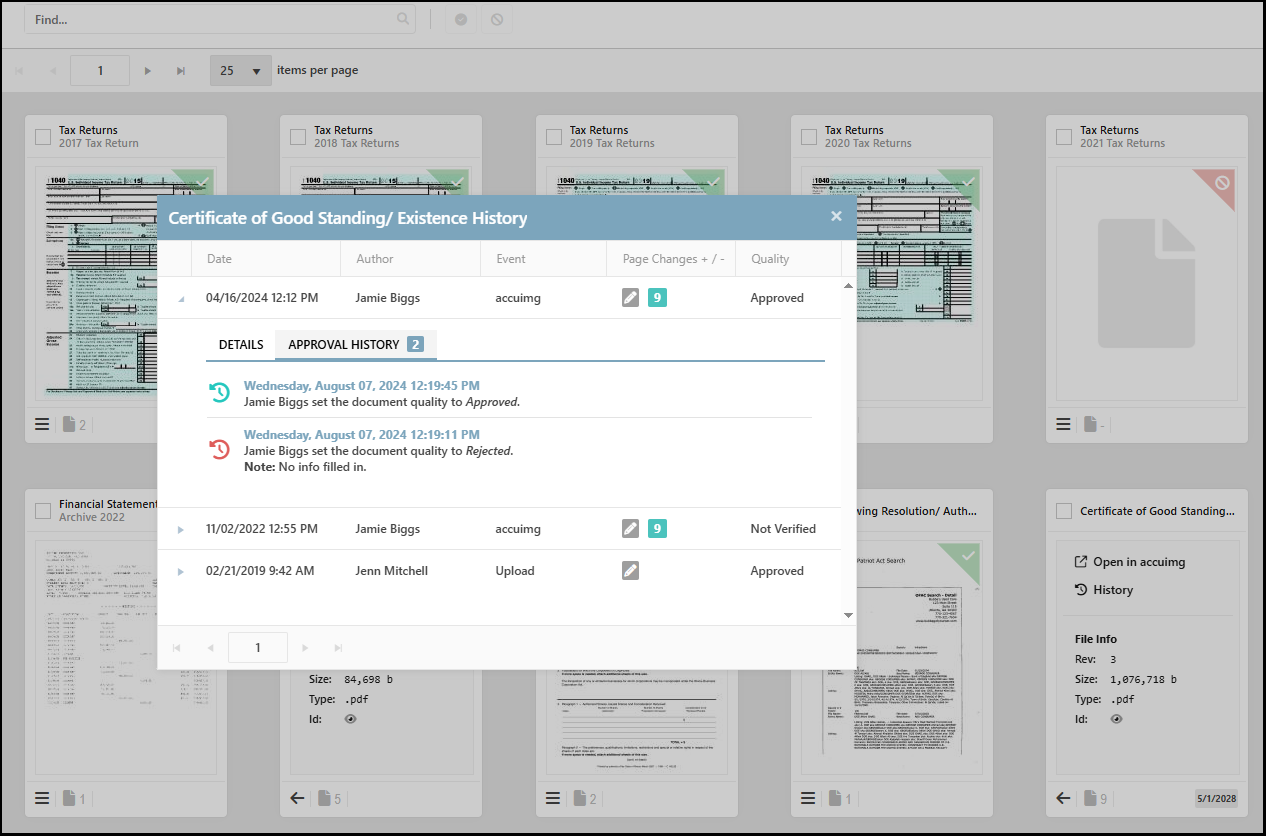
Step 3: Clicking on the document icon shows a dialog box for viewing the document image and QC history, adding comments, and changing the QC status. Selecting “Approved” will mark the document as “QC Approved” in AccuAccount. Conversely, selecting “Rejected” will mark the item as “QC Rejected” and, depending on your preferences, will notify the author (via email) of the document’s rejection. Repeat this process until your work is done.
![]()
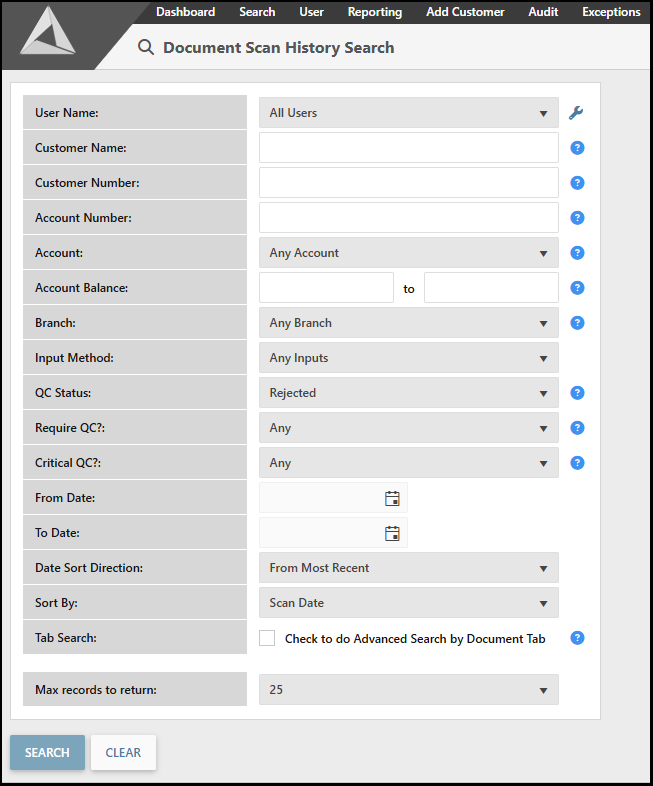
Step 4: Don’t forget to circle back to rejected documents. In the case of QC critical documents, exceptions cannot be cleared until after QC approval. Returning to the “Document Scan History Search” page, filtering for “Rejected” QC status, and running the report provides a list of rejected items to work through.
Play #2: Using Document View
AccuAccount offers multiple views that make it easier to find, view, and interact with a financial institution’s information. “Document view” in AccuAccount enables a similar workflow as the previous play but is especially useful for QC reviews that involve specific account holders.
Here’s the Game Plan
Step 1: Locate the customer or member’s page in AccuAccount and switch to document view.
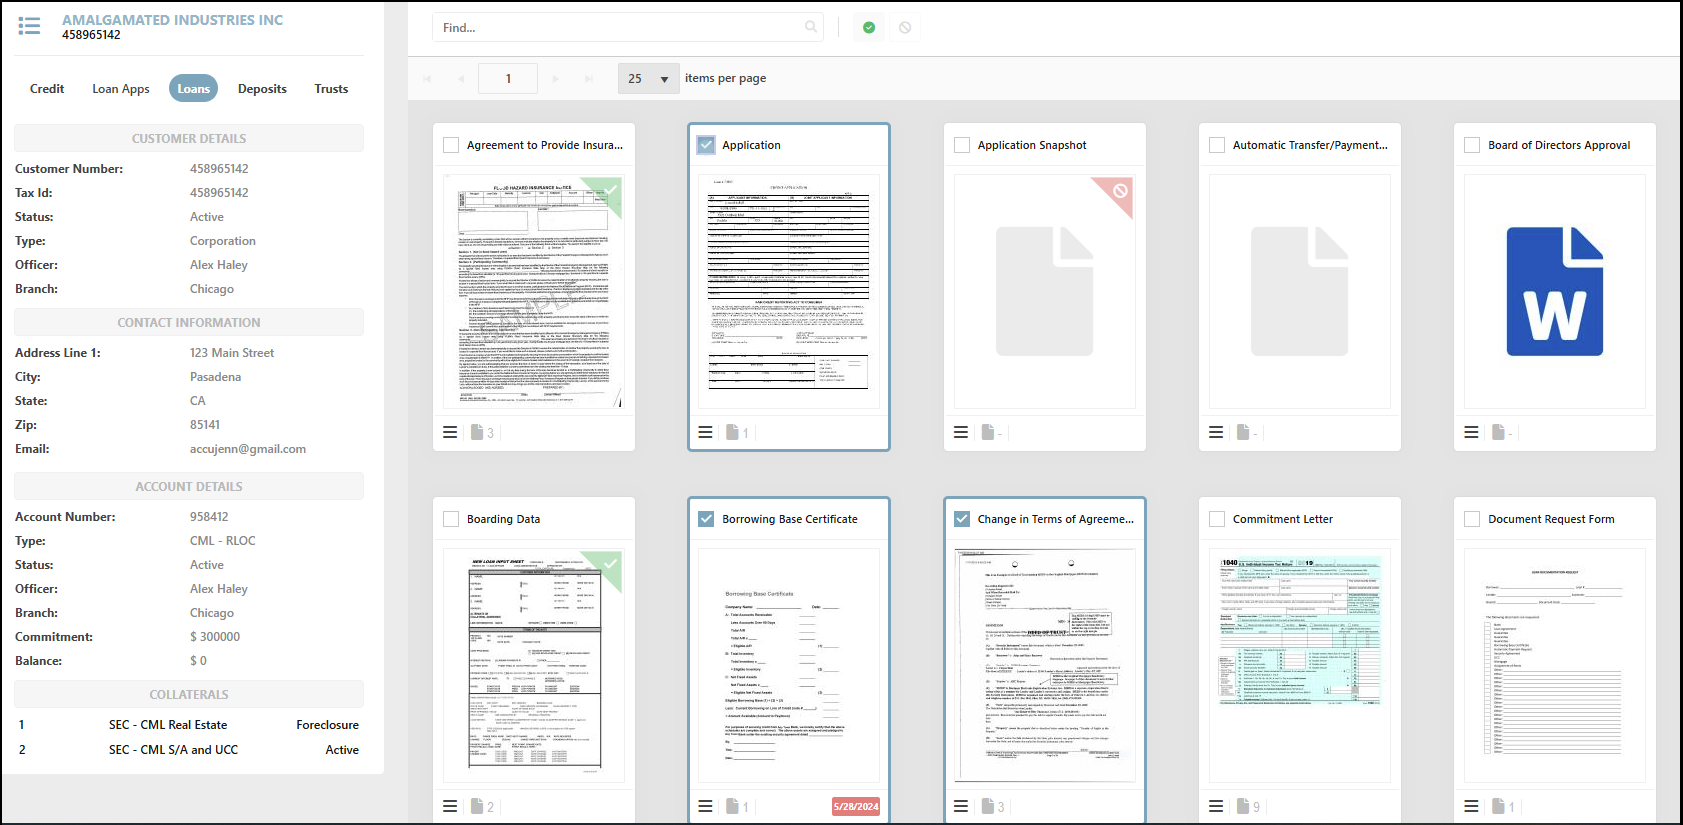
Step 2: Click on the document thumbnail(s) and complete your QC review. Click the checkbox in the thumbnail’s top left corner and scroll to the top of the page. Approve or reject multiple documents at once in just a few clicks.
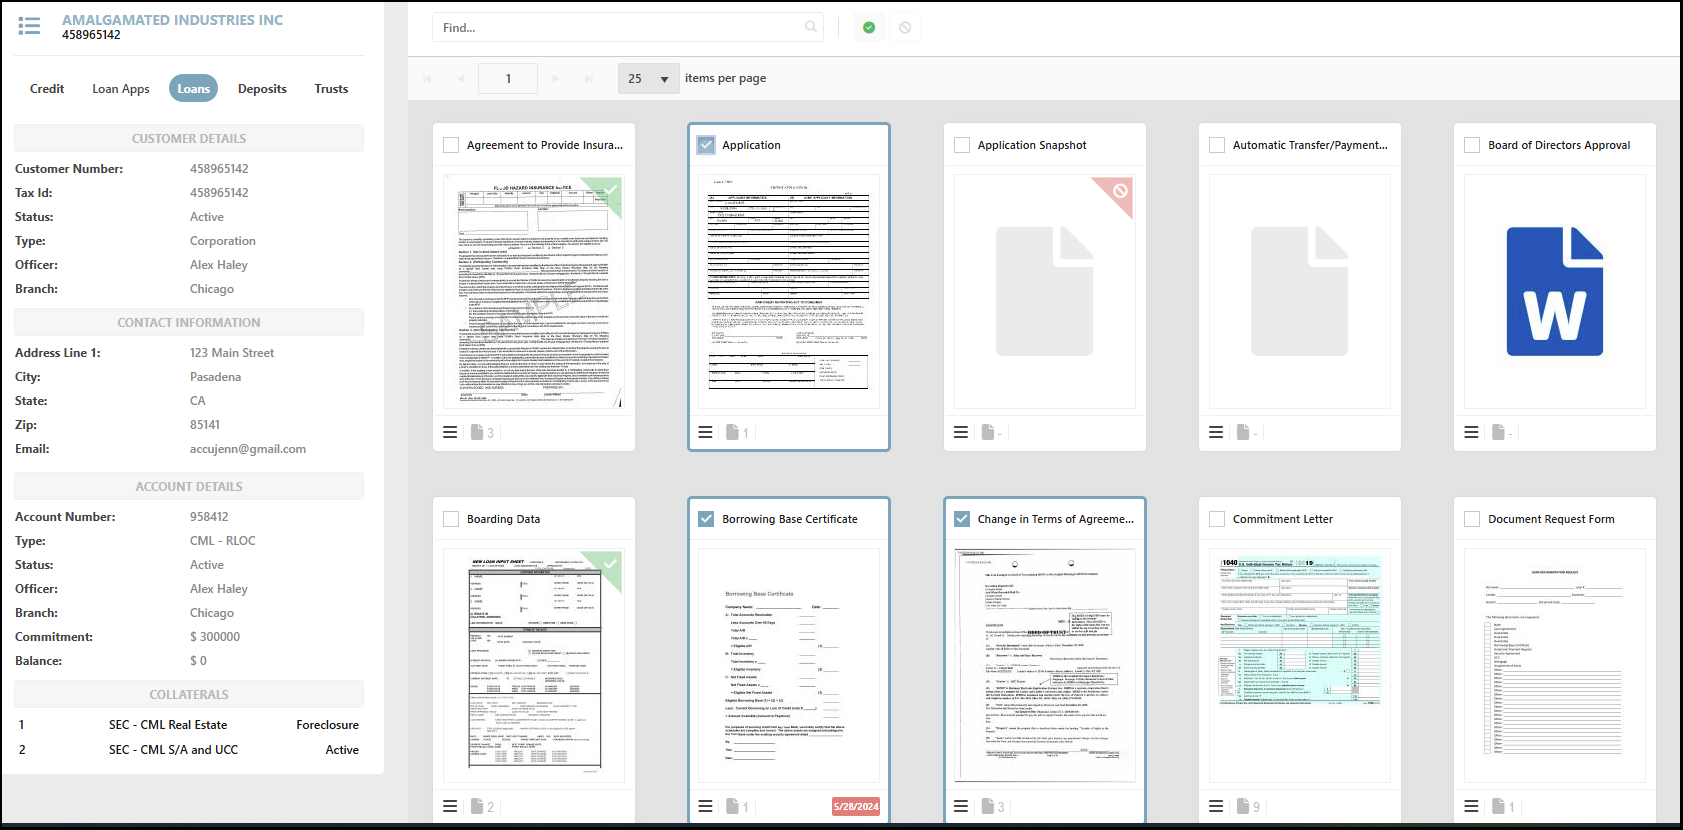
Need to Check an Item’s QC History? Simply click the icon on a thumbnail’s bottom left corner to access that document’s history.
Play #3: Generating a Checklist
Still prefer checklists for document QC? No problem! AccuAccount supports that workflow, too.
Here’s the Game Plan
Step 1: Navigate to the customer or member’s page in AccuAccount and click the “View Document Checklist” option. Download or print a copy of the checklist.
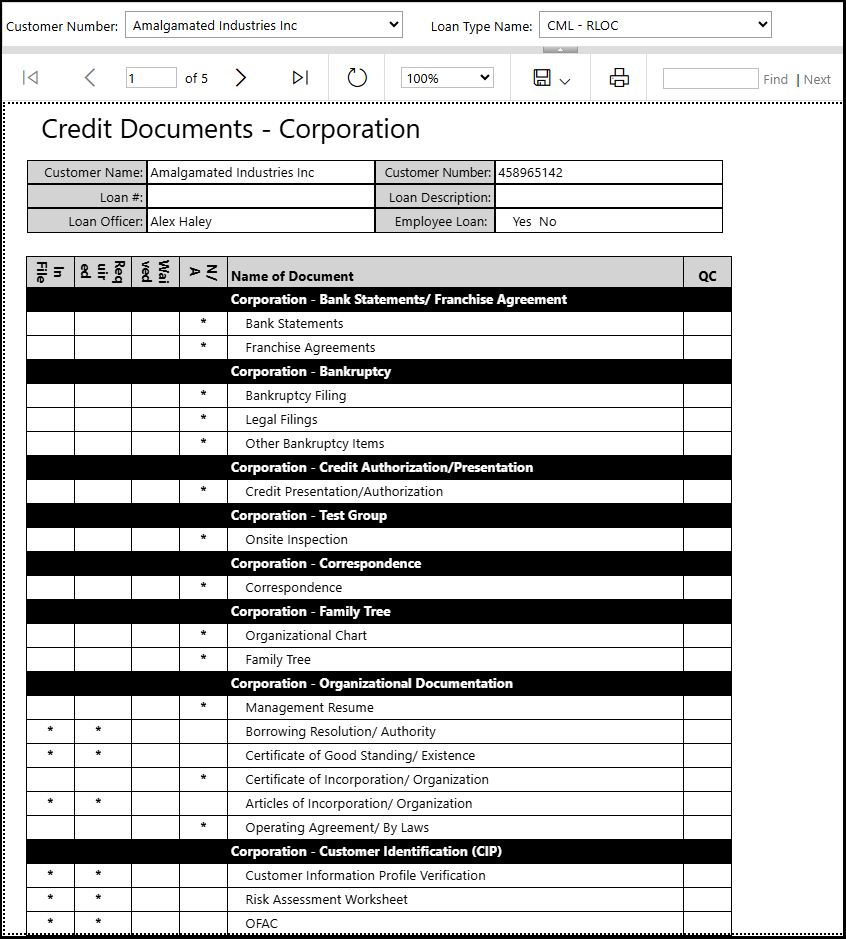
Step 2: Complete your QC process, update the checklist, and scan or upload the completed document to the correct location in AccuAccount.
Upgrade Your QC Workflow
Interested in learning more about document QC capabilities in AccuAccount? Contact us to request a personalized demo of our ECM software for financial institutions.
Be the first to know! Click below to follow us on LinkedIn for news and content updates!